
2 Easy DIY Floral Arrangements for Spring Using Common Household Objects

Spring is in full bloom and what better way to celebrate than with fresh floral arrangements complemented with beautiful vases! Vases that are unique and beautiful can be quite pricey, but these easy, DIY vessels are fresh and will add the perfect touch to your home or office. Since these ideas include objects that you already have lying around your house, your shopping list will most likely only contain a few shades of paint and some fresh blooms!
1. Repurposed wine bottle

If you love wine, this DIY vessel is perfect for you. The final product will add the perfect touch to your mantel, bedside table or kitchen counter.
What you’ll need:
- (1) wine bottle (with labels peeled off)
- (1) small bottle of metallic gold acrylic paint
- (1) can of white spray paint or bottle of white acrylic paint
- (1) 2 inch paint brush
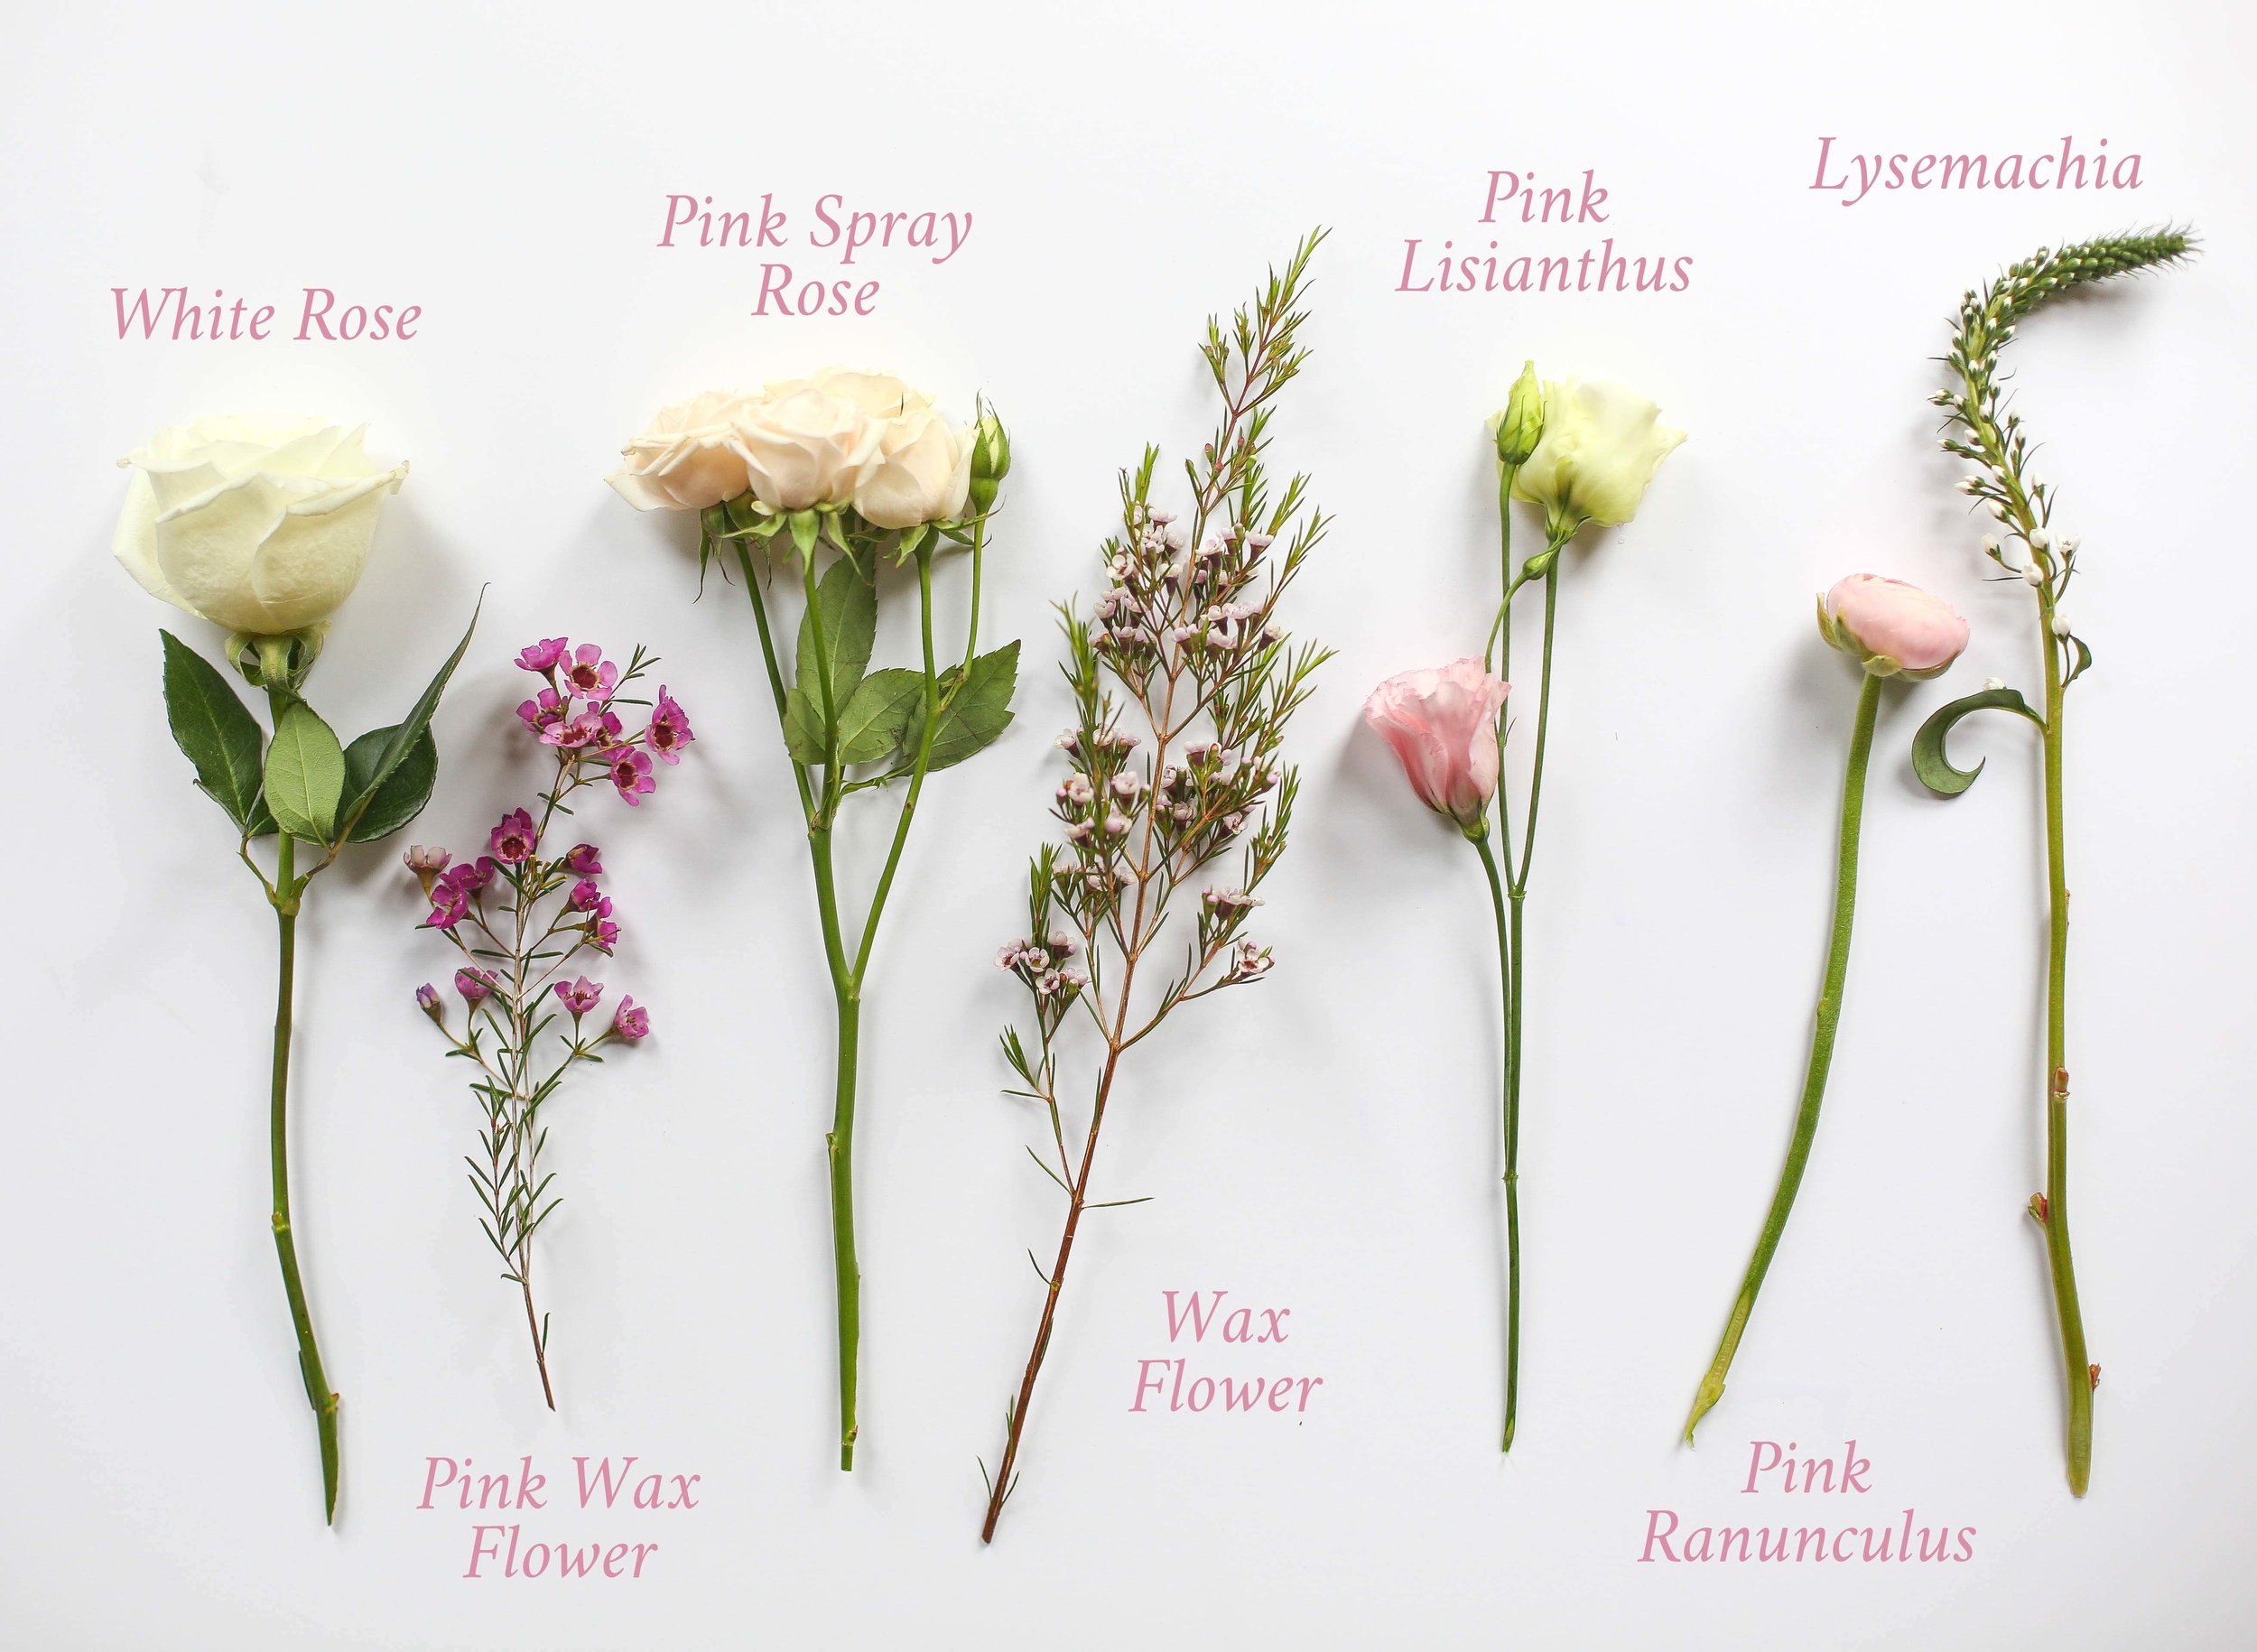
- (2) peach roses
- (3) stems of wax flowers
- (1) stem of pink ranunculus
- (1) stem of white lisianthus


- Start by spray painting or brush painting the wine bottle white. If you have access to the proper safety measures and a suitable space for the process, spray painting is the ideal method. However, brush painting works well too. Spray paint or brush paint the bottle until you obtain a fully opaque layer of white on the bottle.
- Once the white paint has dried completely, use the metallic gold paint and 2 inch paint brush to create “waves” on the bottle. Don’t be afraid to mess up – the waves are not supposed to be perfectly balanced/spread out! The off-balance strokes give the vessel a more artisanal look. As a rule of thumb, the waves should go no higher than 3 inches from the base of the bottle and no lower than 2 inches. The gold paint strokes and layers may become textured as you paint to create an opaque layer. Don’t worry, this is good as it gives the vessel more character and adds to the artisanal look.
- This vessel is great for a person with little to no flower arranging experience as there is really no method to the madness. Simply place all of your blooms in the vase in a careful manner. Be sure that there is a stem or two of wax flower separating the two peach roses from each other.


1. Mason Jar Trio

What’s better than one floral arrangement? Three floral arrangements! There is something magical and unexpected about the combination of rose gold, cream and a colorful pastel hue, so that’s why we incorporated this color combination into our second DIY idea. Any pastel shade would work so we advise you to choose one that best coordinates with the color scheme of your home.
What you’ll need:
- (3) mason Jars
- (1) small bottle of cream acrylic paint
- (1) small bottle of metallic rose gold acrylic paint
- (1) small bottle of (pastel color of your choosing) acrylic paint
- (1) 2-3 inch paint brush
- (9) white roses
- (9) stems of pink wax flowers
- (3) stems of pink spray roses
- (6) stems of wax flowers
- (3) stems of lisianthus
- (9) pink ranunculi
- (6 stems of lysemachia

- Use the 2-3 inch paint brush and the three paint colors to paint one mason jar cream, one mason jar rose gold and one mason jar your chosen pastel color. Wash and dry the brush between painting each jar to prevent mixing colors. When painting, make sure to apply a full layer of paint all over the outside of the jar from the base to the top of the rim. Apply layers of paint until the coating is completely opaque.
- Once each jar is completely dry, you can begin placing flowers in your newly created vessel. Evenly disperse each type of flower in each of the vessels. This arrangement is quite simple for the average person to create as the garden/wildflower look of the arrangement makes it so there is no specific way you need to arrange the individual stems.
- Place all three arrangements together, side-by-side on a coffee table, dining room table or a credenza to add the perfect spring touch to your household.


Although these blooms will sadly last only a bit, your newly created vases will last for years to come! Whether you use them as decoration for your next event or simply enjoy them every morning while sipping your morning coffee, these beautiful spring creations are sure to add a special touch to your day. To see more floral arrangement tips, styling and inspiration follow us on our Instagram @bfloralnyc.